Measure the roof
Once the email with the finished model arrives, it is time to measure. Roofy uses the orthophoto for click accuracy and the elevation map (DSM) as a verification tool for the real 3D measurements.
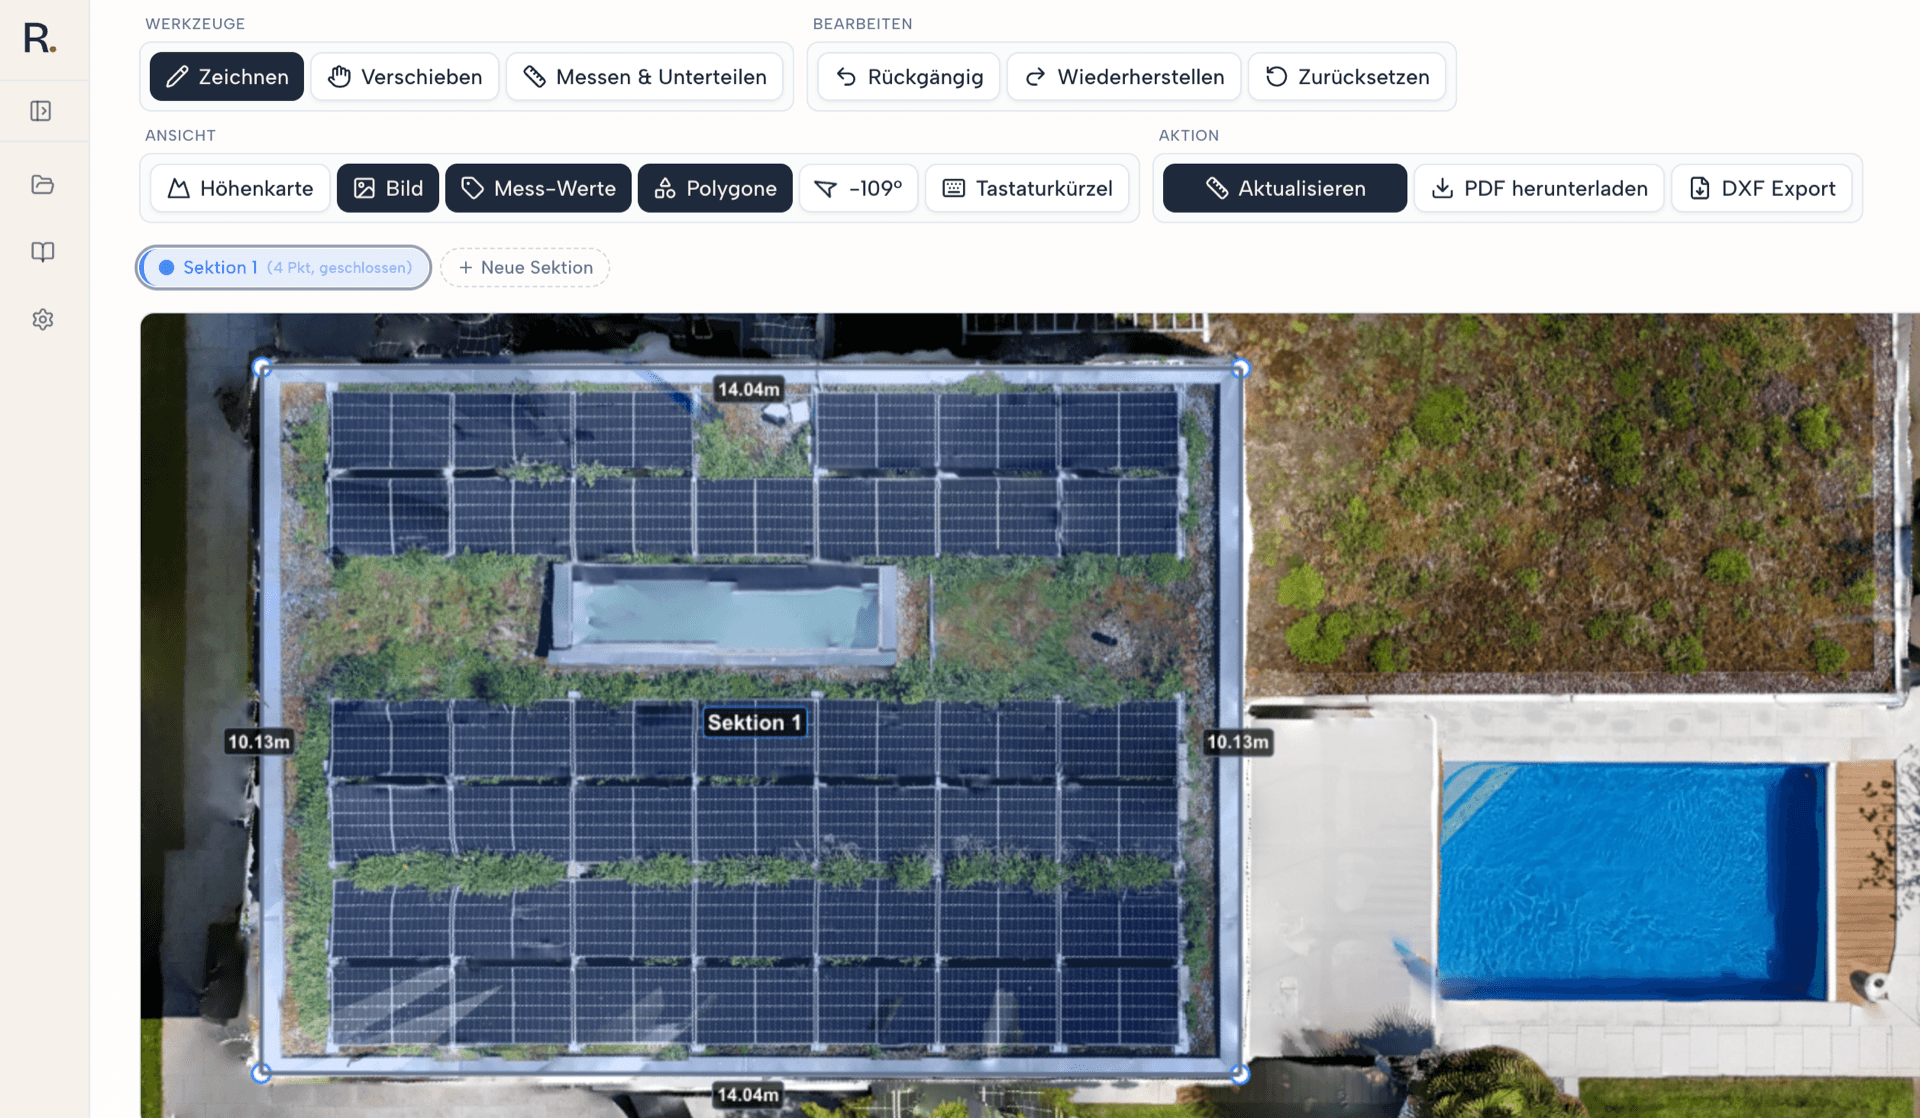
Draw a polygon
Draw the roof area as a closed polygon. Click the corner points in order along the eaves and the verge. As soon as you click the first point again, the polygon closes and Roofy starts classification.
- Switch to draw mode (key D)
- Click the first corner of the roof (typically a roof corner at the eaves)
- Continue point by point around the roof edge, setting each corner and bend individually
- Click on the first point to close the polygon
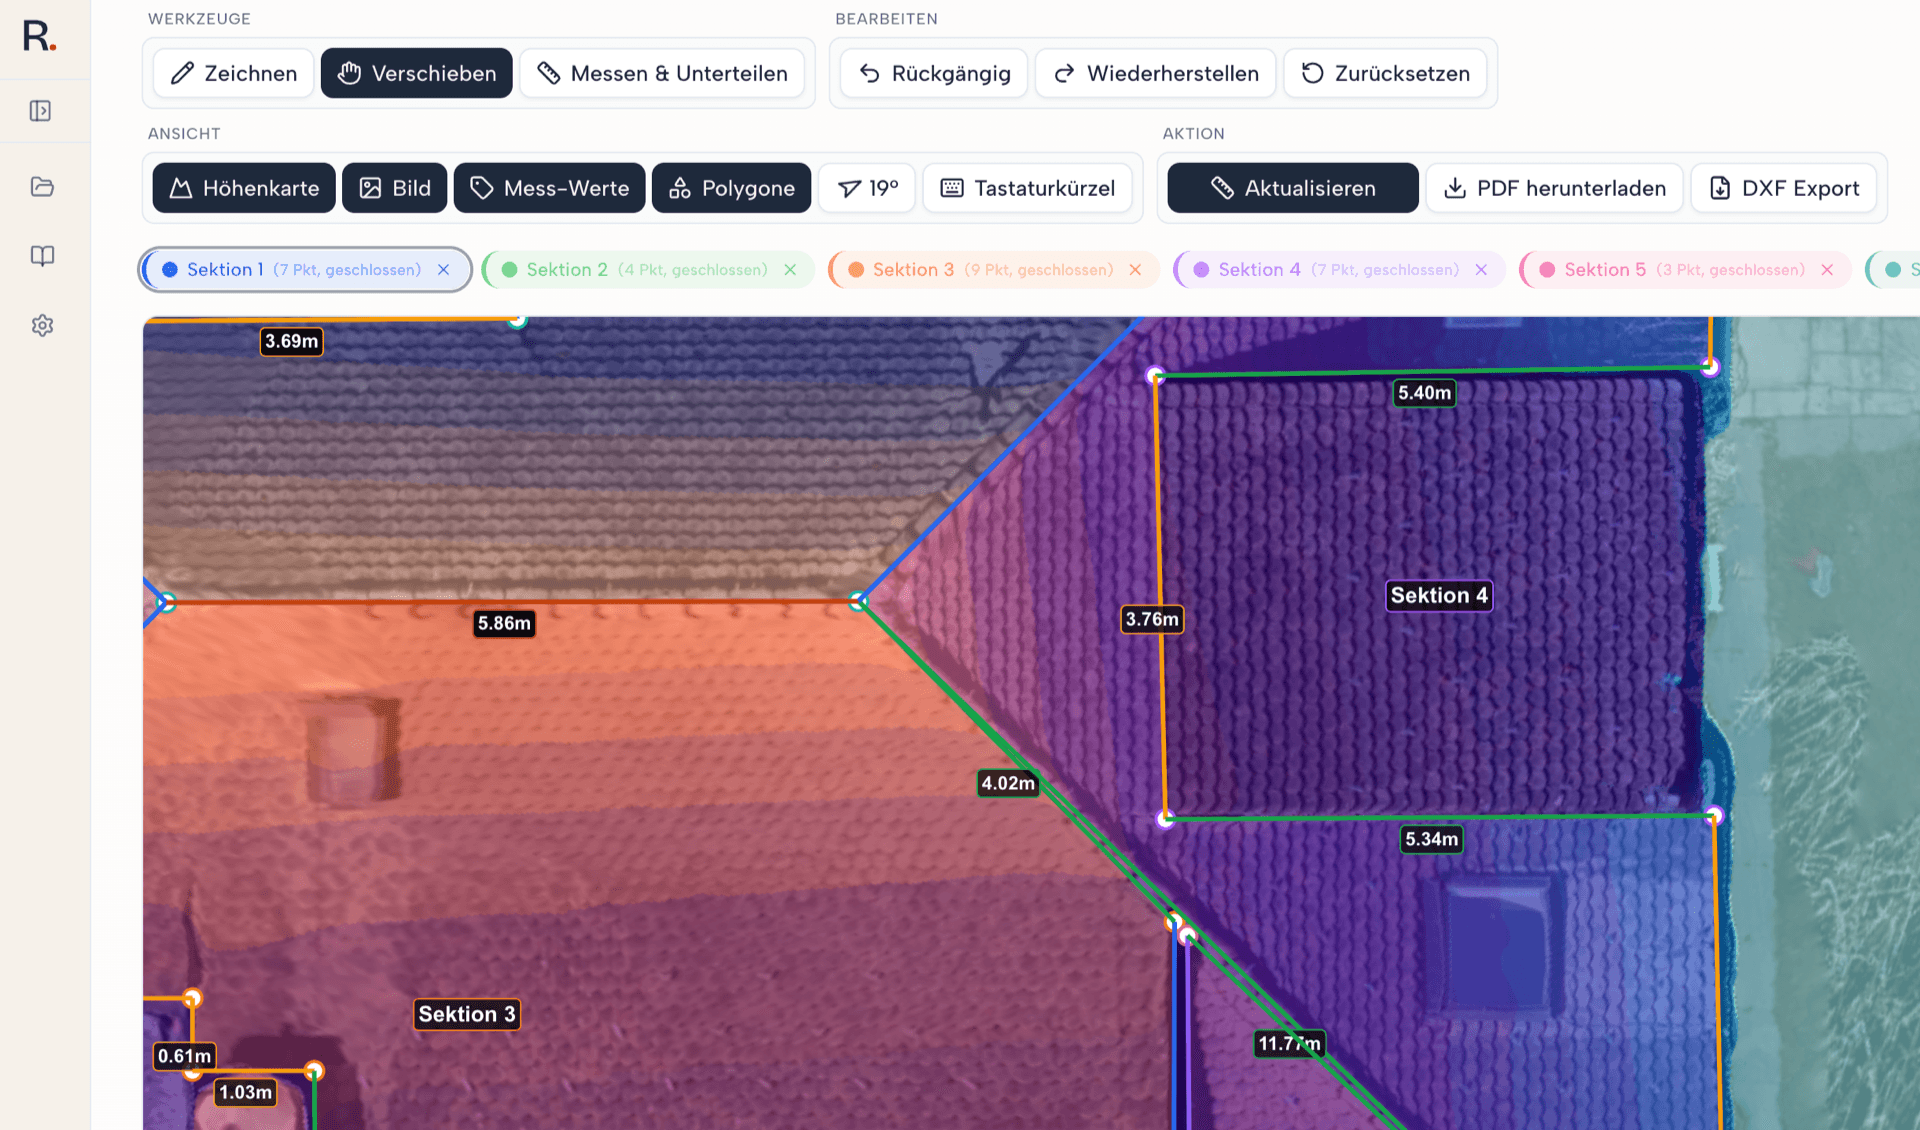
Multiple sections per roof
A roof often consists of multiple surfaces: main roof, dormer, extension, lean-to. Draw a separate section for each roof area. In the section list on the left you can name, colour and manage each polygon individually.
Automatic edge classification
As soon as a polygon is closed, Roofy classifies each edge automatically by function (eaves, verge, ridge, hip, valley, parapet). Classification runs in the background and is based on elevation data and slope. You see the result in the reported length values: on sloped edges (verge, hip, valley) Roofy reports the true rafter length with slope correction, not the horizontal projection.
- Eaves: The lower horizontal roof edge. Reported in true horizontal length, without slope correction.
- Verge: The lateral, sloping gable edge from eaves to ridge. Roofy takes the roof slope into account and reports the true slanted edge (rafter length reference).
- Ridge: The upper horizontal main axis of the roof, where two opposing roof surfaces meet. Reported horizontally, without slope correction.
- Hip: The sloping outer corner edge, typical of hipped roofs where two roof surfaces meet at an outer edge. Slope correction is applied automatically.
- Valley: The sloping inner connecting edge where two roof surfaces meet in an inside angle (for example on L-shaped roofs or dormers). Slope correction is applied automatically.
- Parapet: The upper raised edge on flat roofs. Reported horizontally, without slope correction.
This auto classification is the core of Roofy's measurement accuracy. Instead of measuring every edge individually, you get the right dimensions per edge type automatically, slope correction included.
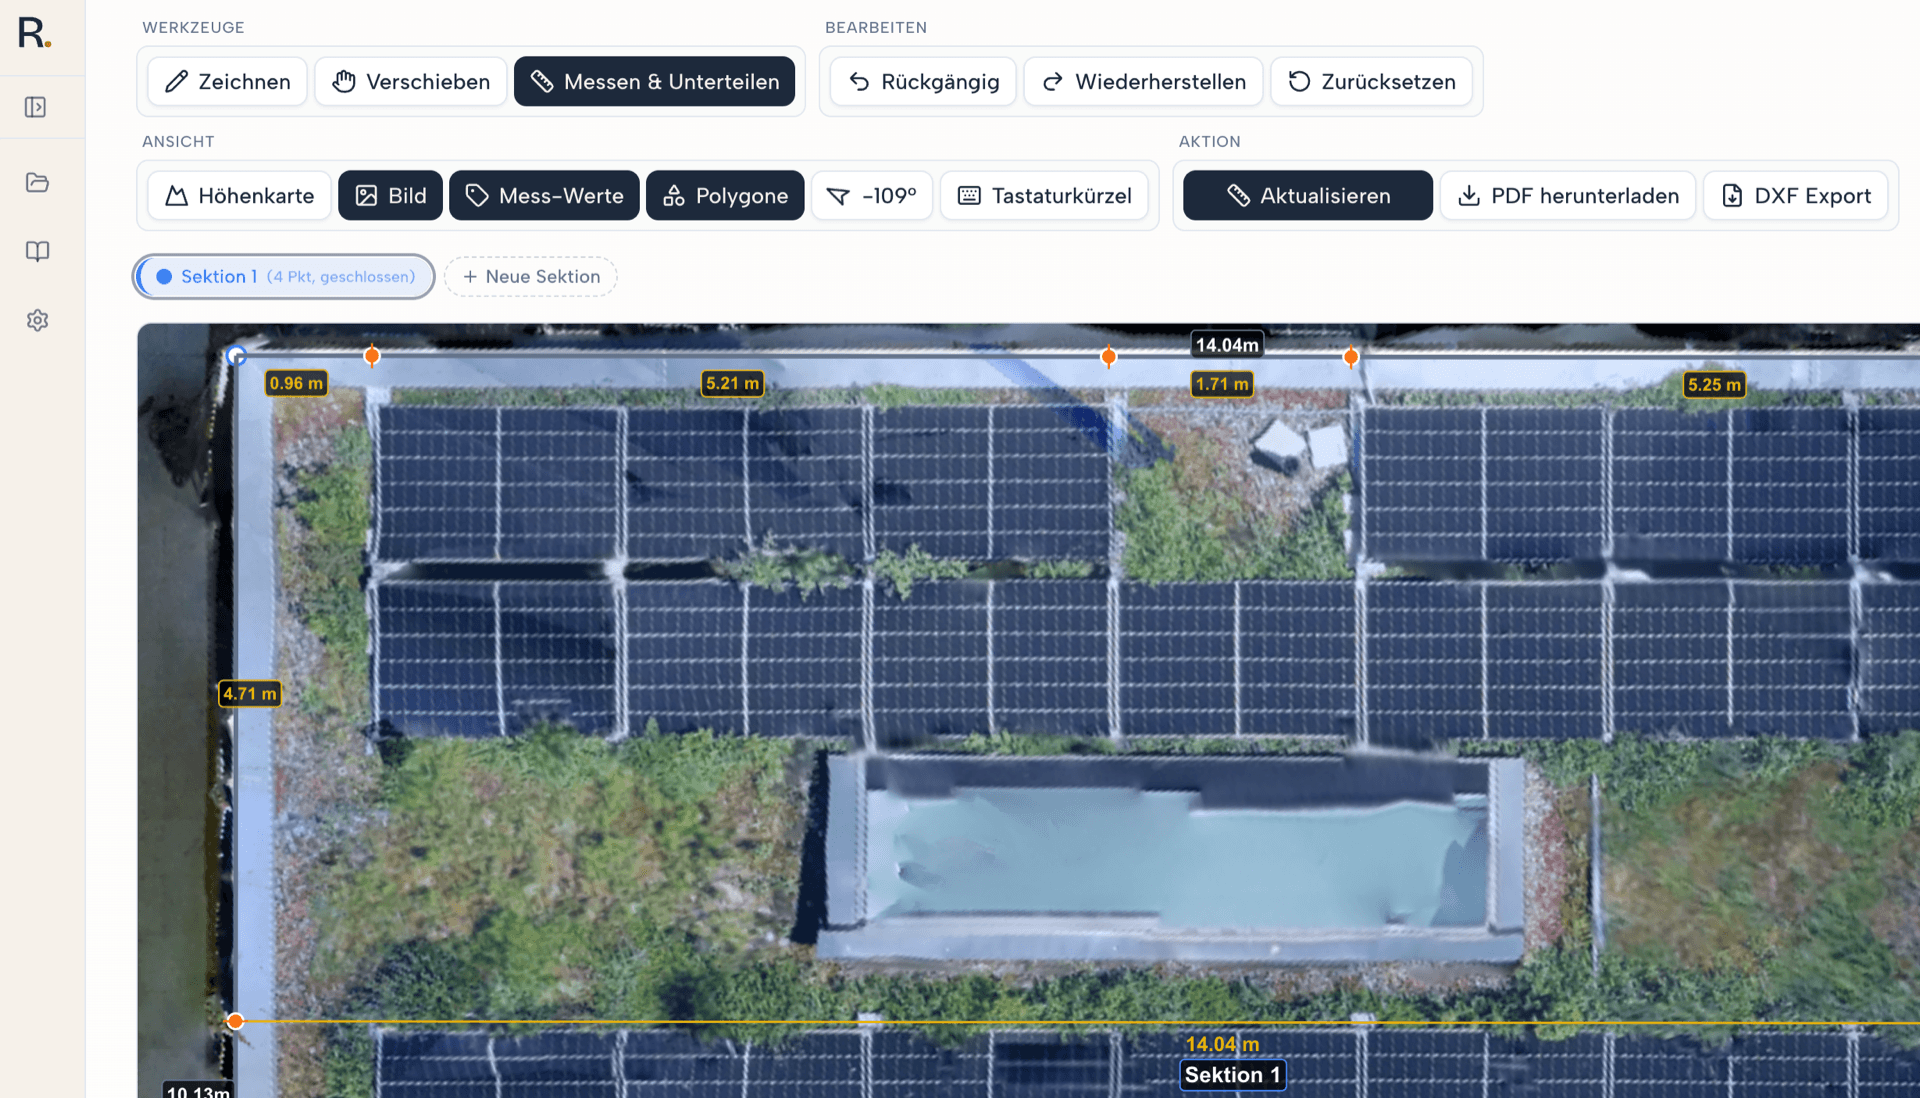
Measure and subdivide
The 'Measure and subdivide' mode (key M) is for additional measurement points inside an existing polygon. You can use it to set points on polygon edges (for intermediate measurements), to measure chimneys or skylights, or to draw free lines across the roof surface.
What you need this mode for
- Intermediate measurements on polygon edges: Clicking on an existing polygon edge sets a split point. The edge is divided there so you get each segment individually reported (e.g. left eaves to chimney = 4.20 m, chimney to right eaves = 3.80 m).
- Measure chimneys: Draw a line around the chimney's base. Roofy returns length and position relative to the main polygon. Useful for cut-outs in the covering.
- Skylights and dormers: If the cut-outs are not drawn as a separate section, they can be captured here as additional measurement segments.
- Free measurement lines: Clicking on the free roof surface (not on an edge) starts a free measurement line. Useful for diagonal segments such as the rafter length from eaves to ridge.
Behavior when setting points
- On a polygon edge: sets a split point, the edge falls apart into two segments
- On the free roof surface: starts a new measurement line between two click points
- Lines snap to existing vertices and polygon edges (see Snapping)
- Length marker shows the distance live while you draw
Typical use cases
- Measure a chimney 3.20 m above the eaves (split point on the verge + free line)
- Add a 1.20 × 1.50 m skylight cut-out as measured area
- Intermediate measurement for layout planning: divide the eaves into 3 equal segments
- Diagonal rafter length from mid-eaves to ridge
Snapping and polygon orthogonalization
Roofy helps you draw precisely with two features: automatic snapping to existing polygon geometries and an algorithm that makes a polygon rectangular.
Snapping while drawing
- Vertex snap: As soon as your cursor approaches an existing vertex (polygon corner), it snaps there automatically.
- Edge snap: If the cursor is near an existing polygon edge, it snaps to that edge. This lets you place new points cleanly on the edge of a section you have already drawn.
- Vertex linking: Click on an existing vertex of another section to link the two polygons at that point.
- Coupled motion: Moving a linked vertex pulls the attached polygons along automatically.
Orthogonalize the polygon (key Q or right-click)
Select a closed polygon in the section list and press Q. Alternatively, right-click the polygon and pick 'Make rectangular' from the context menu. Roofy then tries to bring all corners to 90°. The original geometry is protected during the process.
- Works from 4 corner points and only on closed polygons
- Aborts if the algorithm would destroy the polygon
- Holding Shift while drawing additionally enables angle snap
Hints and warnings
Roofy checks every polygon point against the elevation map. If a point appears to lie at ground level rather than on the roof surface, Roofy marks it as suspicious. These hints are indicators, not errors. They do not block drawing.
How a hint appears
- A short toast with the measured elevation difference may appear right when the point is set
- Suspicious vertices are also marked with a warning marker next to the point as long as the section is open
How to handle hints
- Toggle the elevation map (key H)
- Does the roof surface there show correct elevations? If yes, the hint can be ignored
- If real gaps are visible, redraw the polygon (snapping helps with precise placement) or add extra vertices
- For systemic problems, re-run processing in Precise (see the Upload images guide)
Elevation map as a verification tool
The elevation map (DSM) is Roofy's most important verification tool. Toggle it with shortcut H and check whether the entire roof area shows correct elevation data in the orthomosaic. Cyan tones mark the true roof contours above the ground, independent of shadows, vegetation or scaffolding.
Rule
A warning in the tool is an indicator, not an error. Verify with the elevation map (shortcut H) that the roof surface shows correct elevations. If the elevation map looks clean, the warning can be ignored.
What to look for
- The entire roof area shows continuous cyan tones without holes
- Polygon edges lie on the real roof edge (not on the shadow on the ground)
- No large peaks or outliers that do not belong to the roof
Keyboard shortcuts of the measuring UI
All keyboard shortcuts in the measure editor at a glance. With the ? key you can also bring up this list right inside the app.
Essential keys for smooth control
Two keys make drawing and measuring noticeably more pleasant. Learn these first.
Pan the view
Hold the spacebar to pan the aerial view. This lets you move across the roof quickly without leaving draw mode.
Angle snap
Hold Shift while drawing or moving. Points then snap to 90° angles and straight lines automatically. Ideal for orthogonal roofs.
Modes
| D | Draw mode |
| V | Move mode |
| M | Measure and subdivide |
Overlays
| H | Toggle the elevation map |
| B | Toggle the ortho image |
| K | Toggle classifications (edge colours and lengths) |
Drawing
| Click | Set point |
| Click on 1st point | Close polygon |
| Shift | Angle snap (hold) |
| Escape | Cancel drawing |
| Right-click | Remove last point |
| Snap | Vertex linking (click on an existing vertex) |
Editing
| Cmd/Ctrl+Z | Undo |
| Cmd/Ctrl+Shift+Z | Redo |
| Delete | Delete vertex |
| Drag and snap | Link vertices (drag onto another vertex) |
| Right-click | Context menu (delete, unlink, dissolve) |
| Q or right-click | Make polygon rectangular (select section in list or right-click polygon) |
Measure and subdivide
| Click edge | Start split point and line |
| Click surface | Start free measurement line |
| Shift | Angle snap (hold) |
| Right-click | Delete point or line |
| Escape | Cancel measurement |
Navigation
| Spacebar | Pan (hold) |
| Option/Alt + drag | Rotate image manually |
| Scroll | Zoom |
| ? | Show shortcuts |
Next step
PDF and export
With polygons and measurement lines in place, you can now generate a report.